Payment API
Direct integration for web/non-web apps.
- The customer sends their payment information to the merchant's web site.
- The merchant web site posts the payment data to the Payment Gateway.
- The Payment Gateway responds immediately with the results of the transactions.
- The merchant web site displays appropriate messages to the customer.
Collect.js
Collect.js offers a secure popup form to capture payment data and generate a token for use with the Payment API, keeping raw payment details off the merchant's site.
Integrating Collect.js with your website
Step 1: Past the Following Line of Code Into your Web Page Header
<script src="https://secure.nmi.com/token/Collect.js" data-tokenization-key="your-token-key-here">Step 2: Add the pay button
- Insert a button element within a form element where the customers information is gathered. Ensure that the button has the ID of “payButton”
- The button can be formatted as following:
- The button will indicate to the customer that they will be prompted to enter their card information and check out.
Collect.js will find this button and display the form below in a lightbox over your website.
<button type="button" id="payButton">Pay Now</button>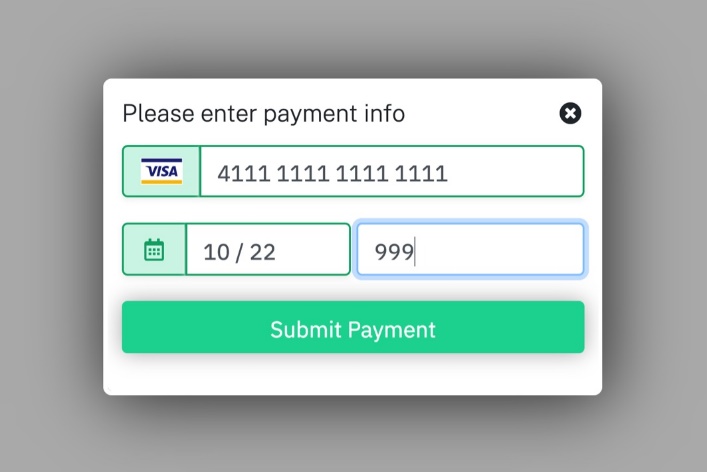
Once the customer enters their payment details, the lightbox will disappear, a hidden field will be inserted into your form with the "payment_token" value, and your form will be submitted.
The transaction can be submitted to the gateway with the Payment API using the "payment_token" variable.
Collect Checkout
Integrating to Collect Checkout is meant to be as simple as possible. The simplest way to integrate is with the button generator in your merchant control panel (coming soon). If you are building your own integration, then here's a quick setup guide.
Integrating Collect Checkout with your website
Step 1: Create Products to Sell in the NMI Product Manager
- Open the Product Manager.
- In the products section, create products by either selecting 'New Item' or 'New Package.'
Step 2: Set up a “Checkout” Security Key
- In the Security Keys page and select “Add a New Public Key”
Step 3: Modify Allowlist
- Add any URLs you will be using for success and cancel URLs to the Allowlist.
Step 4: Copy, Modify, and Paste
- Copy, modify, and paste the below code sample to your website
<!-- This loads the Collect Checkout JS file. Make sure to use your Checkout key. -->
<script src="https://secure.networkmerchants.com/token/CollectCheckout.js"
    data-checkout-key="checkout_public_12345678901234567890123456789012"></script>

<!-- This is the element on your page that we're using to trigger Collect Checkout. --> <button id="checkout_button">Checkout Now</button>

<!--  You must run CollectCheckout.redirectToCheckout to send the customer to your cart.
This is using a click on a specific div, but you can make this anything you like.
All configuration happens in an object passed into redirectToCheckout. -->

<script> document.getElementById('checkout_button').addEventListener('click', function (e) {
    CollectCheckout.redirectToCheckout({
        lineItems: [{
            sku: "0001",
            quantity: 1
        }],
        type: "sale",
        collectShippingInfo: true,
        customerVault: {
            addCustomer: true
        },
        successUrl: "https://example.com/receipt?transid={TRANSACTION_ID}",
        cancelUrl: "https://example.com/",
        receipt: {
            showReceipt: true,
            redirectToSuccessUrl: true
        }
    }).then((error) => {
        console.log(error);
    });
});
</script>
Once this is complete, you should be able to click the payment button on your website and be redirected to the Collect Checkout page.
NMI gateway is a product of NMI. Pepper Pay is a registered reseller of NMI.